Crayon Physics’ Level Editor Tutorial
logr left a great comment on the original Crayon Physics thread. I was a little afraid it might go unnoticed there, so I decided to post it here. It’s a level editor tutorial.
I did some small editing and added the screenshots, but you really have logr to thank for it. logr also wanted to remind people that there is a level editor available in the first place and there are a dozen user made levels you can already play. logr already has a bunch of them and you can download them from his public box.
Well enough talk here’s the tutorial.
—
(Note from Petri: The level editor isn’t really all that feature complete, it’s more a developer tool. But that said using it isn’t really all that complicated. It may seem that there are a lot of steps to go through, but most of them are pretty self explanatory.)
Download level editor
First of all, download the level editor pack (it’s in the June archive, top of the page), then unzip the files.
Now you have a choice to make. You can unzip the files to a new directory or you can unzip and copy them to the same folder where Crayon Physics (“crayon.exe” and the dll -files) is located.
If you copy them to the Crayon Physics folder, then you can more easily test your levels.
But if you unzip them to a separate folder, it’s easier to manage and to observe how the editor works. I recommend you to unzip your files to a separate folder.
Creating a level
Then you should think about your level : just draw the main parts (the ball, the star(s) and the walls) on a paper sheet. Don’t pay attention to any background now, for the editor really doesn’t care!
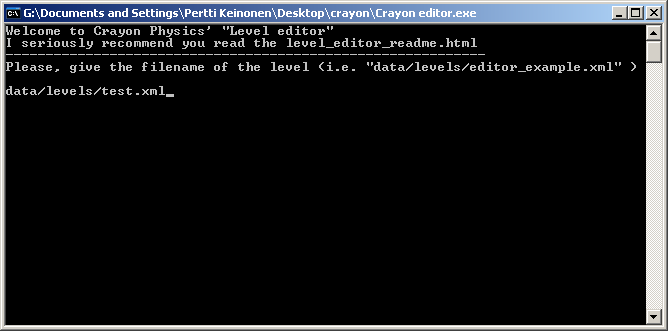
Now you can start the “Crayon editor.exe” file. You should see something like in the screenshot above. You’ll first have to name your level ( “data/levels/test.xml” is perfect, since you’ll be able to change everything when done with the editor). The editor will ask something about creating new level, just answer yes.

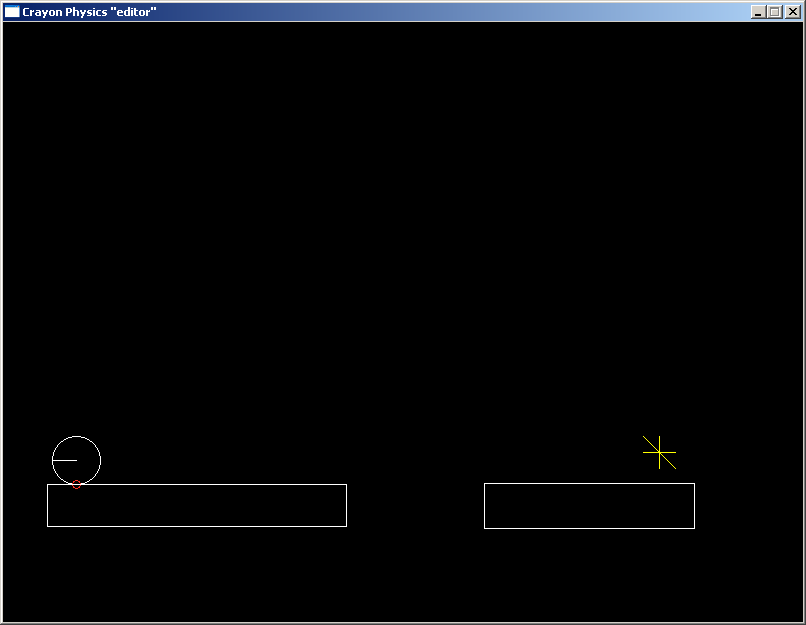
When you are faced with the black screen (like the one in the shot above) push S to register your level (S saves the level).
(There is one bug I came across: when closing the editor and re-opening it, it seems the editor doesn’t remember the file (when you are to name your level). When it says to create a new one, just answer yes. You’ll get to the black screen with the white lines, provided you haven’t forgotten to push S before closing the editor.)
Here’s a description of the shortcut keys
Drawing with your left mouse button down will create a “free” object (it’s the same as the game)
Holding left shift down and drawing (while left-clicking, of course) will create a “static” object (which I call a wall)
Z adds the ball
X adds a star
S saves the level
L loads the level
Now that you know the shortcut keys, just draw your level (don’t mind the black/white colors until you’re done with the editor). Remember to push S when you’re done.
Testing your level in the game
You should now have at least two new files in the data\gfx folder : the bmp and the xml files. There will also be a xml file in the data\level folder.
If you’re working in the same folder where “crayon.exe” is located you can skip this next step.
Copy the files from your gfx -folder to the data/gfx folder of Crayon Physics. Also copy the xml file from data/level folder to Crayon Physics’ data/level folder.
In order to test your level in the game you have to edit the “data/level_list.xml”. You can do with your notepad. Just open the file and change the line that says:
<Level completed="1" filename="data/levels/level_01.xml" position="1" >
to this:
<Level completed="1" filename="data/levels/test.xml" position="1" >
of course in the place of test.xml put in the name of the file you gave for your level. And remember to save the file.
(You don’t have to put the level as your first level, but you can extend the number levels you have at your disposal. Just add the level before the the_end.xml. And remember to increase the position numbering.)
Then start crayon.exe
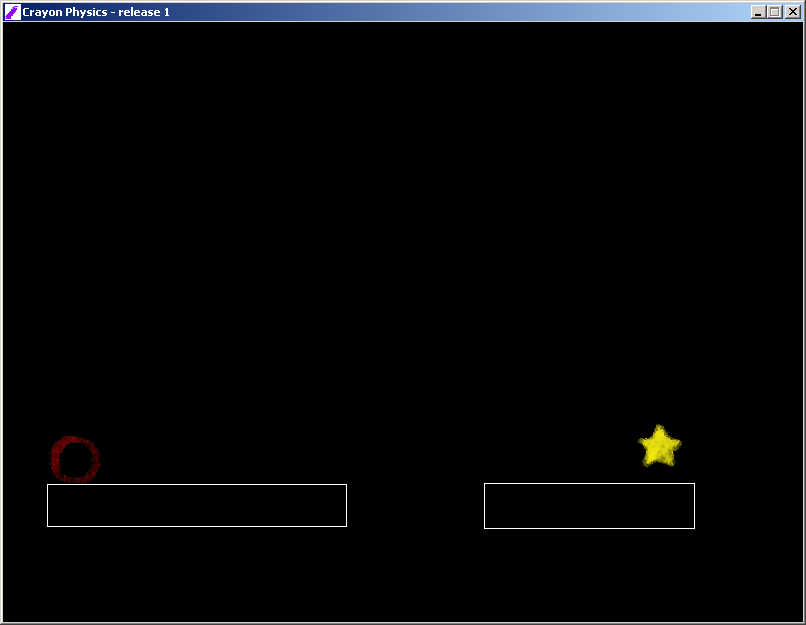
You should see the level you created in the editor (with the black background and all).
To change the backgound
NOW, you can add your own background (the black one is kind of dark…) and your own walls (instead of the white lines). So here is what you’ve gotta do :
-First of all, create your background and save it as a bmp files (give it a different name than the first bmp file)
-then open the 2 files with Paint.
-push ctrl+I in the first file to exchange black and white, then ctrl+A.
-Paste it on your background using the “transparent paste” (I don’t know how to put it in English).
-On your background, you should now have black lines (boxes) covering it.
-Just fill the black boxes with anything you want to get your own platforms.
Now you’ve got it! Just save and rename your background so as to replace the black/white background.
All that is left to do is test it again with the new background and have fun playing it.
(I suggest you zip your files and send them to Petri Purho to show your creations)
(Note from Petri: I’d love to see your levels, but you should also thank logr for all the work he’s done for Crayon Physics)